Putting together a table tennis racket can be daunting, especially if you haven’t done it before. However, if you know what you’re doing, it’s actually a pretty simple task. That’s why we’re here to help!
In my opinion, most players can improve the process of gluing their rackets, as there are tons of tips and tricks that will not only make the process easier but also make your racket play better.
Gluing your rubbers correctly is essential. You can have the best blade and rubbers, but if the contact between them is suboptimal, the bounce will be uneven, the rubber won’t grip the ball properly, and the feeling of the racket will be completely off.
A well-glued racket will help you feel the ball better and give you more spin, among many other things. In this article, we’ll help you achieve just that.
Tools Needed
Before starting the process, we will outline the tools you’ll need.
You will need 7 items:
- Blade
- Rubber/s
- Glue
- Sponge
- Scissors/cutter
- Roller
- Paper towels (optional but recommended)
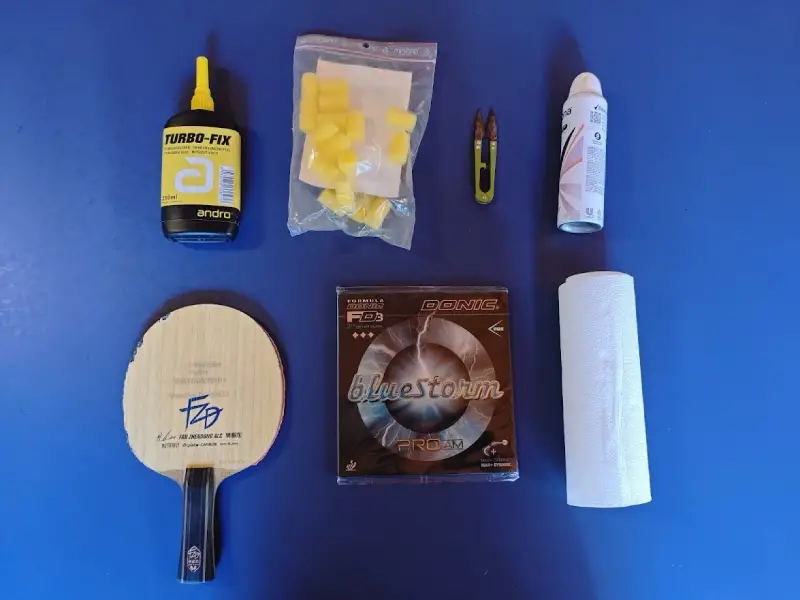
Firstly, you will need a blade and a rubber (or pair of rubbers) if you’re planning to build a complete racket from scratch.
This time, we’ll be changing the forehand rubber of my main racket. We’ll be gluing a new Donic Bluestorm Pro AM to my Butterfly Fan Zhendong ALC.
Next, you will need a sponge to apply the glue onto the rubber. Most glues come with small sponges you can use, but a kitchen sponge like this is also totally fine:
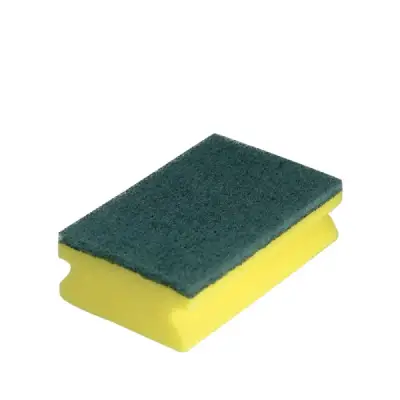
You can buy one of these, cut it into little pieces, and get 6-8 sponges for the same amount of rubbers.
You will also need the most important item on this list: VOC-free table tennis glue.
What glue you choose makes a world of difference. It is extremely, extremely important that you choose a glue you like to get the best results.
I have tried many brands of glue, some of which I liked more, while others I liked less.
Some make it easy to take the glue off when removing the rubber, others have a stronger effect so that the rubber doesn’t come off when you hit the racket onto the table, some dry faster, etc.
After trying many different glues, I settled on using Andro’s Turbo Fix. Even though it doesn’t come off easily if you take your rubbers off, I really like it because it gives me a good feeling with the ball and my rubbers don’t come off when I hit the table. The bond it produces is very strong.
Other recommended glues are Butterfly’s Free Chack, Nittaku’s Fine Zip, and DHS’ #15 glue, which is especially recommended for boosted rubbers.
The next item is either a cutter or scissors. I personally use scissors because I don’t really care about having the perfect cut.
I think scissors are the most convenient to use while cutters will give you the cleanest cut. Either is fine.
In addition, you will need a roller to roll your rubber onto the racket. I generally use a tube of deodorant but any cylindrical object that has little weight and covers the width of your racket will be fine.
Lastly, one item I always use when gluing my rubbers is paper towels.
I always put a paper towel next to the racket I’m gluing so that if I put too much glue on either the blade or rubbers, I can take the excess off on that paper towel.
I find it extremely handy and I never have too much glue on my racket because of this little hack.
You can also put paper towels below your blade and rubbers so that you don’t get glue on your table or desk.
Step 1: Applying the Glue
Now that you have everything you need, it’s time to glue your racket!
Before applying the glue, make sure that your workspace is organized, clean, and tidy. I strongly recommend not gluing your rubbers, for example, at the club, where people may touch your blade or rubbers, knock them off the table, etc.
In addition, being at the club makes you want to speed up the process to try your racket out. Gluing a rubber doesn’t take too long, so there’s no need to rush. Just take your time and make sure you’re doing everything right.
Firstly, you will apply glue to the rubber. You don’t want to apply too little or too much. Then, distribute the glue with the sponge as evenly as you can using top-to-bottom motions. Then, set it aside.
After distributing the glue on your rubber, take your blade and do the exact same thing. You can use the same sponge, but use less glue on the blade than on the rubber, because your sponge will already have glue in it.
Distribute the glue evenly as you did with the rubber, and set it aside for it to dry.
Step 2: Wait Time & Drying
So, you’ve applied glue to both the blade and rubbers. Now, we wait. But for how long?
How long your rubbers and blade take to dry will completely depend on the weather.
So, if you have the chance, it’s better if you choose a hot and dry day over a cold and humid one.
The drying process can last anywhere between 5-10 minutes to 2-3 hours.
I have glued rubbers on hot, dry summer days of around 37°C (98.6°F) and you can literally see the drying process happen in front of your eyes.
And, I remember another time a friend came over to have his rubbers glued by me, it was the only day we could do it, it was a rainy winter day. We had to wait for upwards of 2 hours for them to dry.
I’m writing this article in winter, so it’s very cold here in Buenos Aires. The weather this day was 8°C (46°F), 47% humidity.
My blade and rubbers took a total of 1 hour and 20 minutes to dry completely. I’d say the normal wait time in average conditions, say, 20°C (68°F) and normal humidity is around 20-30 minutes.
There are ways to speed up the drying process if you need to have your racket glued by a certain time.
For example, you can leave your components close to a heater, you can use a hair dryer (though I wouldn’t recommend it, just to be safe), you can use the package your rubber came into and push air towards the blade and rubbers, etc.
However, I’d recommend that you just set the racket aside and wait. Now, how do we know when our components are ready to be glued?
Firstly, the glue has to turn completely transparent, with no white spots whatsoever. That’s the bare minimum requisite.

And, just to be sure, an extra measure you can take is to press onto the rubber with your finger and see if it sticks. If it does, that means the glue isn’t completely dry yet, so wait for just a bit longer.
Once the glue is completely transparent and your finger doesn’t stick too much onto your rubbers, you’re ready to put your racket together.
Step 3: Aligning and Pressing the Rubber onto The Blade
Now comes the hardest part: putting the racket together.
Firstly, grab your roller and keep it next to your blade. Then, grab your rubber and hover it over the blade.
Take your time and don’t rush, otherwise, you may glue your rubber slightly over the handle or leave a small gap between the handle and the head of the blade. Both have happened to me so it’s better to take your time.
Also, make sure that you aren’t coming at an angle and that you’re going to glue the rubber straight on.
Once you’ve aligned your rubber perfectly to the end of the handle, fix the bottom part of the rubber onto the blade. Then, grab the rubber with one hand and take your roller with the other, as we demonstrate in the video.
Now, you have to roll your rubber onto the blade. Make sure to use minimal pressure, you just want to ensure that the rubber contacts the blade on every spot.
If you use too much pressure, you’ll break the bond between the blade and the rubber, and you’ll have to do this process all over again.
Once you’ve rolled your rubber onto your blade, keep rolling it on the sides to ensure the sides are well glued, also with minimal pressure.
Step 4: Cutting Excess Rubber Cleanly
Now that the hardest part is done, it’s time to cut the rubber.
You can cut the excess rubber either with a pair of scissors or with a cutter/scalpel. A cutter will produce a much cleaner cut if you’re a perfectionist, but I’ve always used scissors.
Make sure to do this process slowly as well so that you don’t cut the blade and you don’t leave excess rubber on.
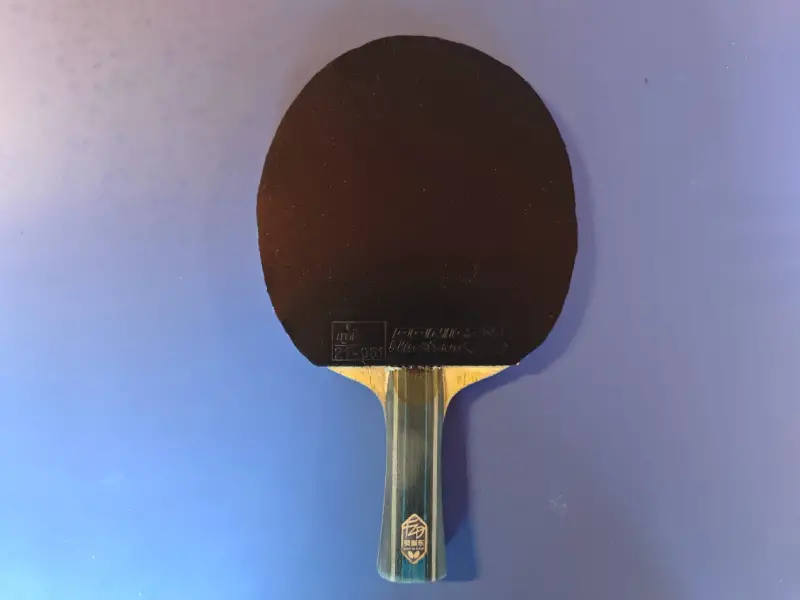
Here’s the final result 🏓
(Optional) Finish Off with Edge Tape
This one’s personal preference, I don’t use edge tape but many players do and it’s a wise idea to do so, especially if you have a fragile blade, like mine.
Using edge tape is a good idea because it will protect your blade when you accidentally hit the table and it will prevent your rubbers from coming off on the sides.
I don’t like using edge tape because I feel like it slightly alters the feeling of my blade.
Some professional players feel the same and they’ve started using edge tape only on the side where you hit the table.
If you’re a righty, that would be the left part of your blade, and if you’re a lefty, that’d be the right part of your blade.
Common Mistakes to Avoid
The most common mistakes when it comes to gluing rackets are:
Not using a good glue
I’ve used table tennis glues in the past that don’t produce good results, so your rubbers come off very easily if you hit the table. This means you have to be gluing your rubbers all the time.
I recommend reputable glues such as Andro’s Turbo Fix, Butterfly Free Chack, or Nittaku Fine Zip.
Not using a sponge
I have seen countless players glue their rackets using their fingers or using dirty sponges.
A kitchen sponge is perfect, just make sure it’s brand new so that it isn’t dirty.
Not waiting long enough
Many players will glue their rackets before they’re completely dry.

This will hinder the bond between the blade and the rubbers, so be patient and wait until all the components are dry enough.
Using too much pressure when gluing
This is the biggest mistake of all, as you will definitely break the bond between the blade and the rubbers.
If you’ve ever played with a badly glued racket, you’ll know that it plays terribly, so make sure that the bond between the blade and the rubber is perfect.
Not aligning the rubber properly
I’ve left gaps between the rubber and the handle tons of times, and I’ve also glued rubbers over the handle more than once.
That’s why I learned to take my time when aligning rubbers to the handle.

Alvaro’s a qualified ITTF Level 1 Coach who's been playing Table Tennis since he was 15 and is now ranked within the top 50 in his native Argentina. He loves to compete in provincial tournaments and is always looking for ways to improve. Alvaro made his favorite memories with a racket in hand, and he joined the RacketInsight team to share his passion with other players!
Blade: Butterfly Fan Zhendong ALC | Forehand: Butterfly Dignics 09c | Backhand: Butterfly Tenergy 19
Playstyle: The Controller


Under the heading “Common Mistakes To Avoid” of your tutorial, Rubber Gluing Guide, you list Using too much pressure when gluing as the bigest mistake of all because it will definitely break the bond between the blade and the rubbers.
I see no possible reason why pressure will break the bond.
Can you please explain what you mean by “pressure.” Are you referring to when the rubber is pressed to the blade? If you are, what could possibly be the physics that would “break the bond”. Clearly one cannot press the rubber so hard that the glue would be forced from the contact rubber into the foam of the rubber.
Thank you,
Caesar
Hi Caesar, thanks for the thoughtful comment.
Yes, the pressure referred to is exactly when you press the rubber onto the blade during gluing. What Alvaro meant in the guide is that pressing too hard can sometimes push the glue layer too thin, distort the contact between blade/rubber, or unevenly distribute glue across the surface. This leads to a weak or inconsistent bond, especially near the edges. I see this most commonly with water-based glues, where it can cause the rubber to peel off earlier than it should. You’re right that glue won’t usually soak into the sponge, but overpressing can still distort the bond.
You want firm, even pressure, just not overly forceful. Hope that clears it up!
Cheers,
David
Hello,
What kind of scissors do you use to cut the rubbers, because I see that they are some unusual ones?
Regards
Hey Jacek!
Alvaro actually uses curved blade scissors specifically designed for table tennis rubbers. I’m not sure exactly which brand he uses, likely ones he bought in Argentina but you can get similar at most table tennis shops. The curved shape makes it much easier to cut smoothly around the blade without jagged edges. Highly recommend picking up a pair if you glue rubbers regularly.
Cheers,
David